Wet vs. Dry Decal Installation: Which Method Is Right for Your Project?
Custom decals are a simple and effective way to add branding, graphics, instructions, or personality to vehicles, windows, walls, equipment, and other smooth surfaces. But once you have the perfect decal, there’s another question: How should it be installed?
There are two common application methods: wet application and dry application.
Both can produce a clean, professional result when done correctly. The best method depends on the size of the decal, the surface, the material being used, and the installer’s experience.
At Davis Sign Co., we work with customers on a wide range of custom decals and graphics. Here’s a simple look at the difference between wet and dry installation.
What Is Dry Decal Installation?
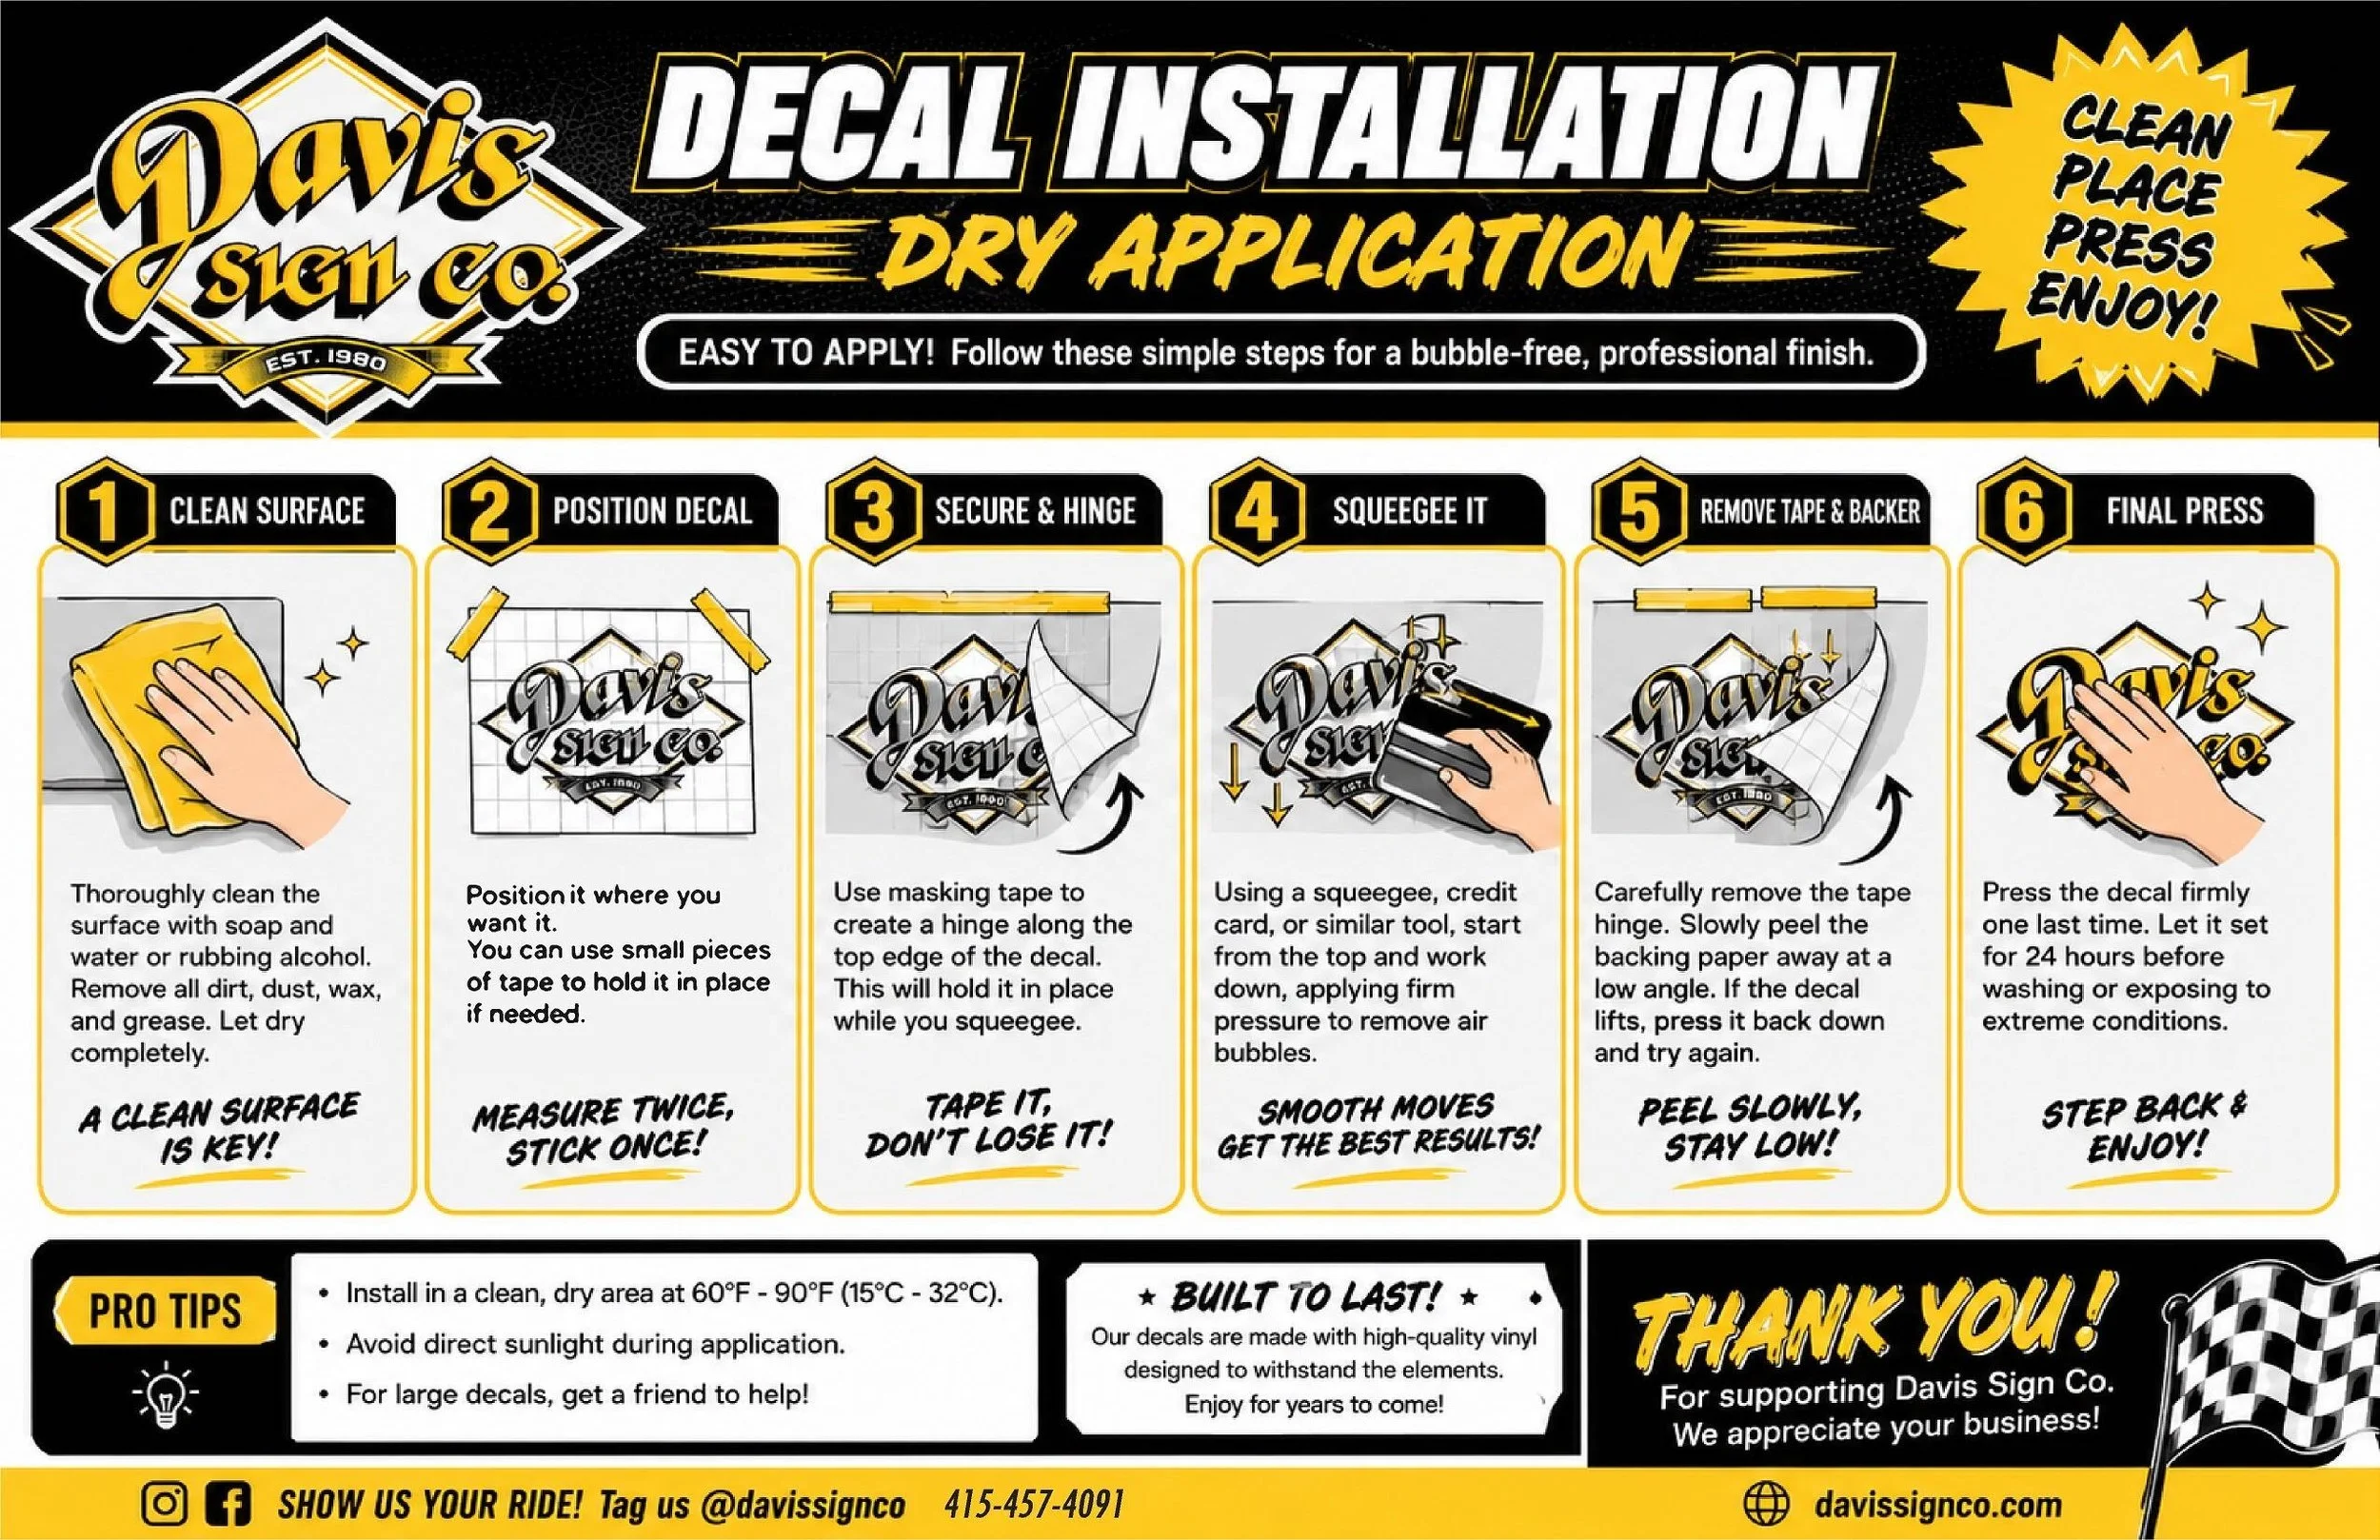
Dry application means applying the decal directly to a clean, dry surface without using an application solution.
This method is often ideal for smaller decals and situations where precise positioning is important. Once the adhesive touches the surface, the decal begins sticking, so careful placement is essential.
How Does Dry Application Work?
The basic process is:
1. Clean the surface
Remove dirt, dust, wax, grease, and other contaminants. The surface needs to be completely dry before application.
2. Position the decal
Place the decal where you want it. For larger graphics, use small pieces of masking tape to temporarily hold it in position.
3. Create a hinge
Tape along one edge of the decal to create a hinge. This keeps the graphic in place while you begin applying it.
4. Squeegee the decal
A squeegee is a flat application tool used to press the decal onto the surface and push out air bubbles. Start at the hinged edge and work gradually across the graphic.
5. Remove the tape and backing
Slowly remove the application tape and backing paper. If part of the decal lifts, lower it back down and press it again.
6. Give it a final press
Press the decal firmly one last time. For best results, allow it to set before washing the surface or exposing it to extreme conditions.
When Is Dry Application a Good Choice?
Dry installation can be especially useful for:
Smaller decals
Simple graphics
Flat, smooth surfaces
Experienced installers
Projects where immediate adhesion is helpful
The main advantage is control and speed. There is no water or application solution to wait for, and the decal begins adhering immediately.
What Is Wet Decal Installation?
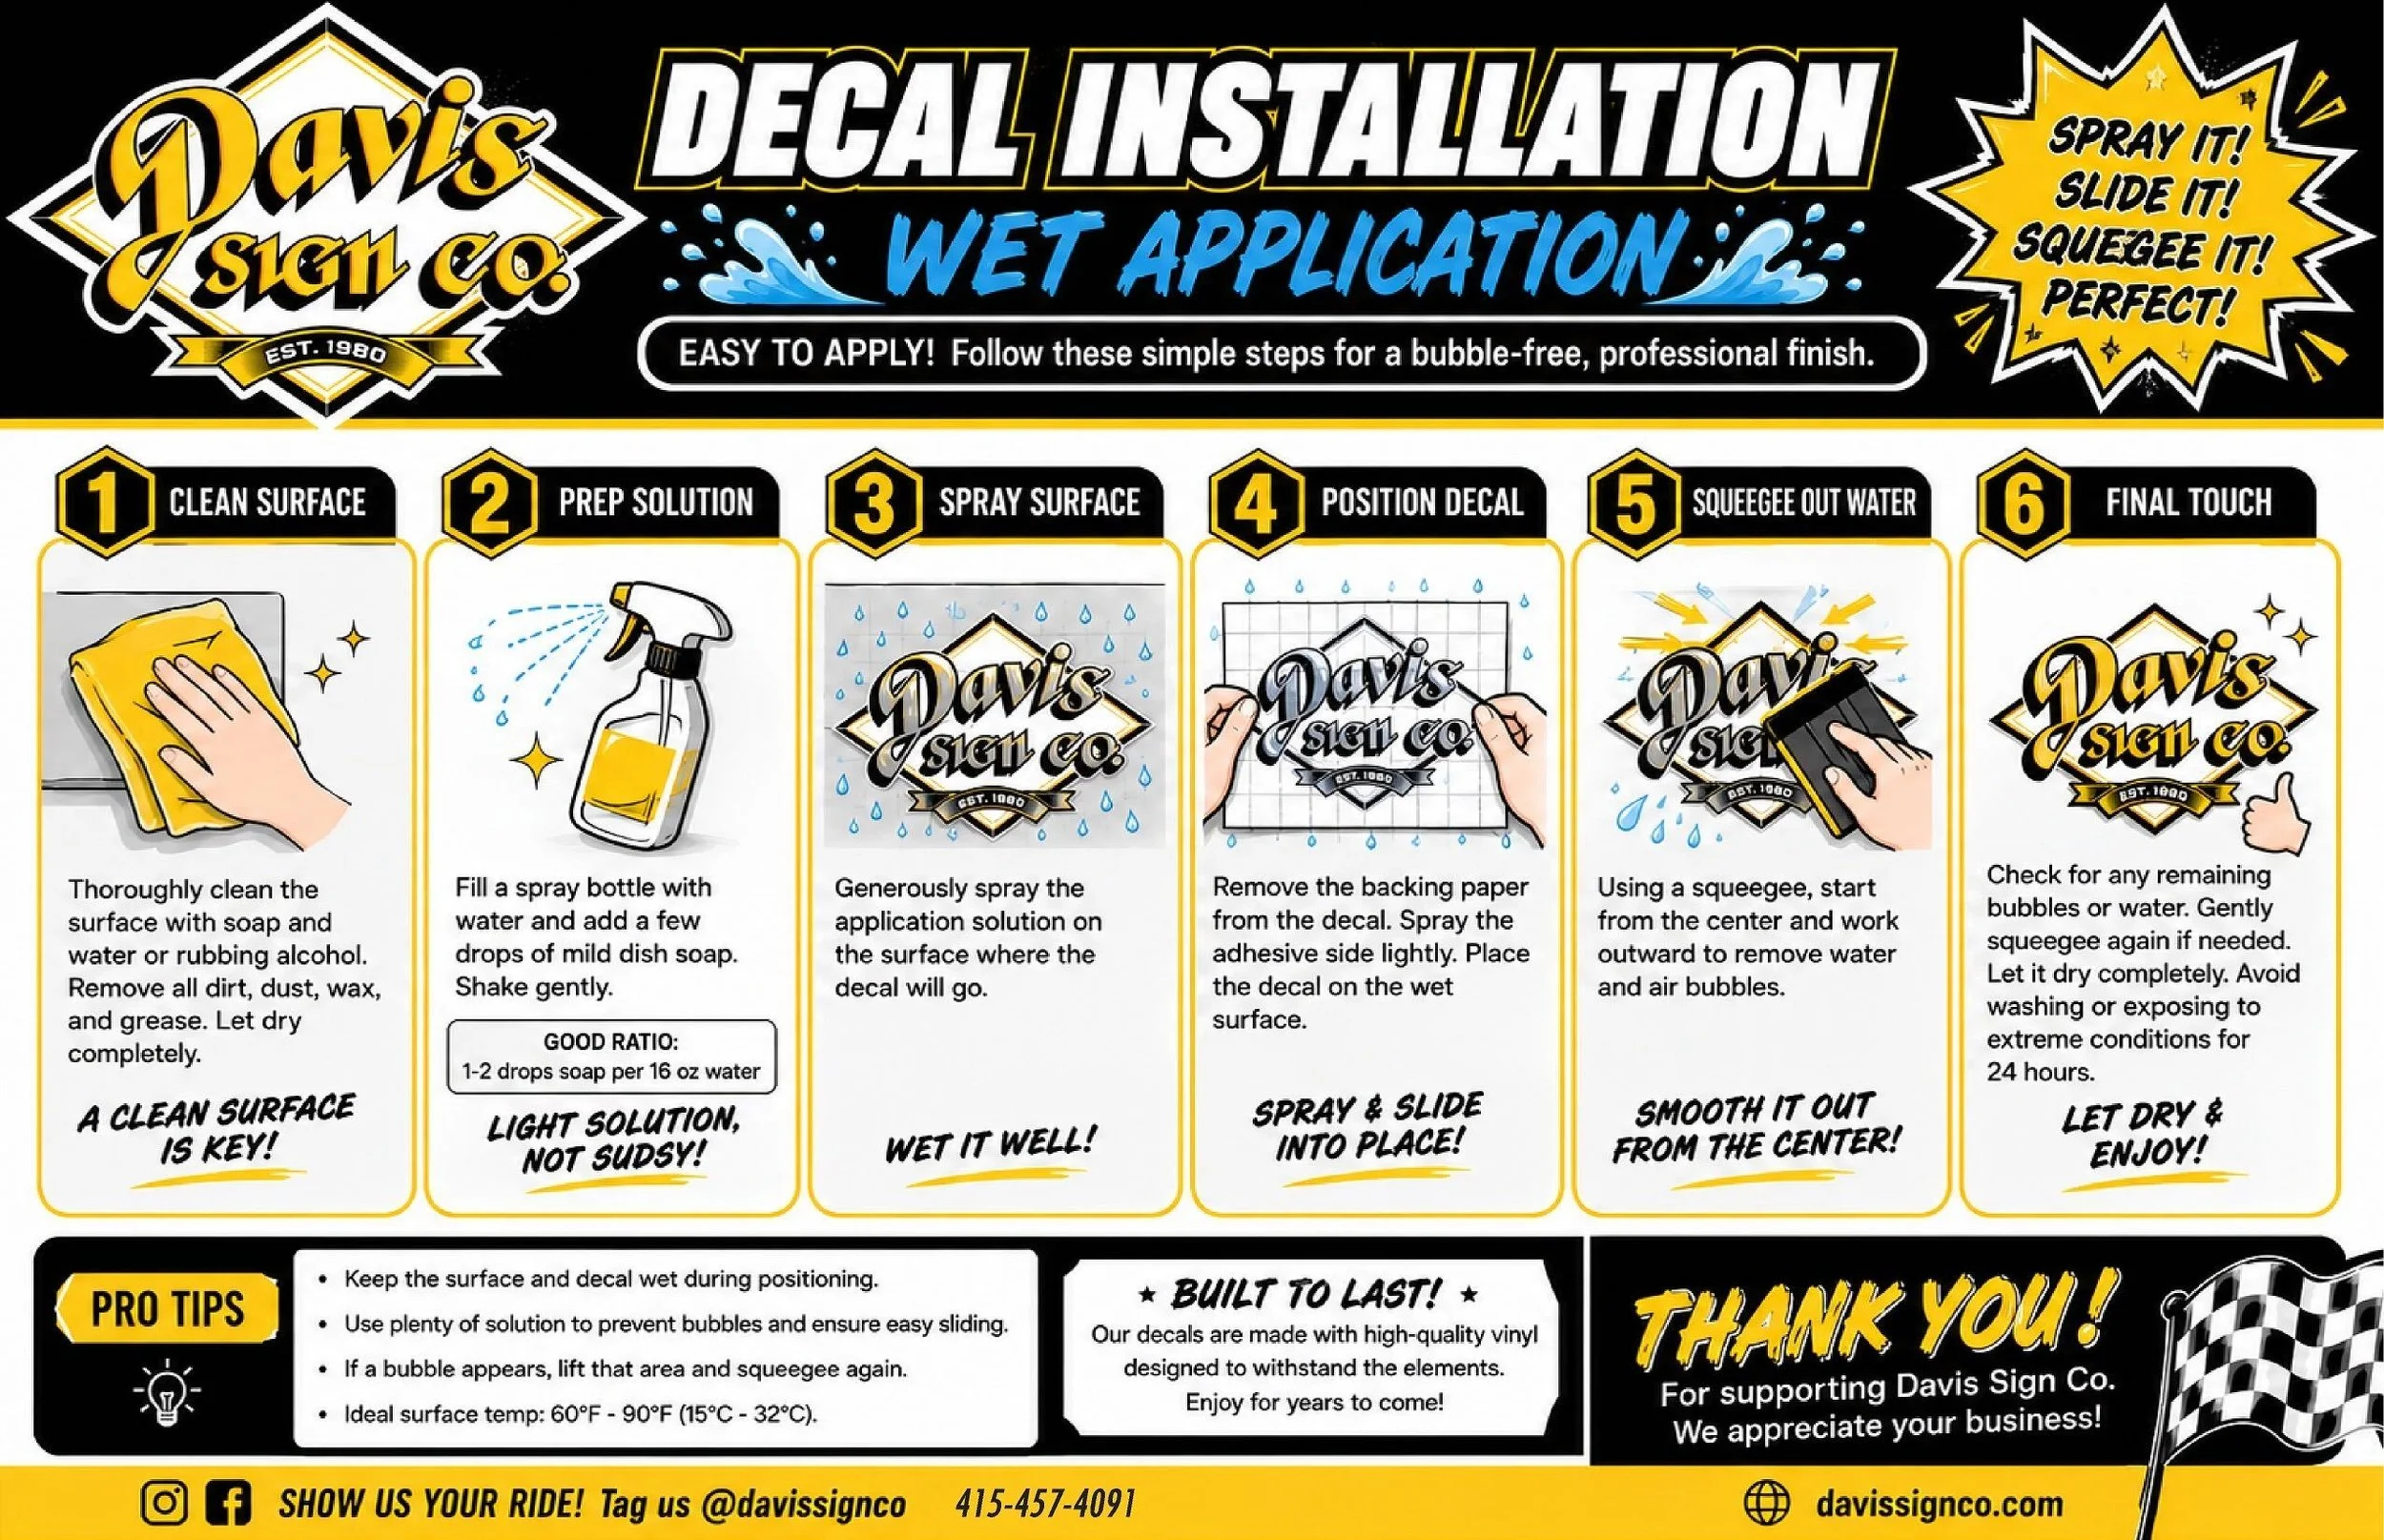
Wet application uses a small amount of liquid solution between the decal and the surface during installation.
This allows the decal to temporarily slide into position, making it easier to adjust before it permanently adheres.
Wet installation can be particularly useful for larger decals or graphics where getting the position exactly right is important.
How Does Wet Application Work?
1. Clean the surface
Just like with dry installation, start with a thoroughly clean surface. Remove dirt, dust, wax, and other contaminants, then let the surface dry.
2. Prepare the application solution
A light solution of water and a few drops of mild dish soap can be used. The goal is to create enough moisture to help the decal move—not a surface covered in excessive soap or suds.
3. Spray the surface
Generously mist the area where the decal will be installed.
4. Position the decal
Remove the backing paper and lightly spray the adhesive side. Place the decal onto the wet surface and slide it into the desired position.
5. Squeegee out the water
Starting near the center, use a squeegee to push water and air toward the edges of the decal. Work carefully and evenly.
6. Let it dry
Check the decal for remaining bubbles or water. Once everything is smooth, allow it to dry completely. Avoid washing or exposing the newly installed decal to extreme conditions for approximately 24 hours.
Wet vs. Dry Application: What’s the Difference?
The biggest difference is how much control you have while positioning the decal.
With dry application, the adhesive contacts the surface immediately. That makes the process faster, but it also means you need to place the decal accurately.
With wet application, the moisture temporarily reduces the initial grip of the adhesive. This allows the decal to slide and be repositioned before it fully bonds.
Dry Application
Wet Application
No solution required
Uses water-based application solution
Faster initial application
Allows more positioning flexibility
Adhesive bonds immediately
Decal can slide into position
Good for smaller graphics
Often useful for larger graphics
Requires precise placement
Provides more room for adjustment
Neither method is automatically better. The right choice depends on the particular decal and installation.
Which Method Should You Use?
If you’re installing a small decal on a smooth surface, dry application may be the simplest option.
For a large graphic where precise positioning is critical, wet application can give you more flexibility.
There are also situations where the material manufacturer’s recommendations should take priority. Certain vinyl materials and specialty graphics are designed to be installed using a specific technique.
When in doubt, it’s best to ask the sign professional who produced the decal.
A Clean Surface Is the Most Important Step
Regardless of the installation method, preparation matters.
Dust, grease, wax, and other contaminants can prevent the adhesive from bonding properly. Taking the time to thoroughly clean the surface can make a significant difference in the final result.
For the best application conditions, Davis Sign Co.’s installation guide recommends working in a clean, dry area with a surface temperature around 60°F–90°F (15°C–32°C) and avoiding direct sunlight during application.
A Few Professional Decal Installation Tips
Whether you’re using the wet or dry method:
Measure twice before committing to the placement.
Work on a clean, dry surface.
Avoid installing in extreme temperatures.
Use a quality squeegee to apply even pressure.
Take your time around edges and corners.
For large decals, consider having a second person help.
Allow newly installed decals time to properly set before washing them or exposing them to harsh conditions.
And remember: a little patience goes a long way.
Should You Install Your Decal Yourself?
Some smaller decals can be relatively straightforward to install yourself, particularly when the surface is flat and the graphic is easy to handle.
Larger vehicle graphics, complex shapes, multi-piece graphics, and decals being installed on expensive equipment or difficult surfaces can be much more challenging.
A professional installer has the experience to select the appropriate application method, position the graphic accurately, minimize bubbles and wrinkles, and achieve a clean finished appearance.
Custom Decals From Davis Sign Co.
Davis Sign Co. produces custom vinyl decals and graphics for businesses, organizations, vehicles, windows, equipment, and more.
Whether you need a few stickers for your business or a large-scale graphic installation, our team can help determine the right material and application approach for your project.
Have a decal project in mind? Contact Davis Sign Co. to discuss your artwork, surface, size, and installation needs.
From design and production to installation, we’re here to help you get a clean, professional result.