Have a logo, graphic, or image you want to turn into a sign? Before printing or producing your design at a larger size, it’s important to make sure the artwork is prepared correctly. One of the most useful steps is vectorization: converting an image into a format that can be resized without losing sharpness.
Whether you’re creating storefront signage, vehicle graphics, wall graphics, decals, or banners, understanding vector files can help you get better results from your next signage project.
What Is Vectorization?
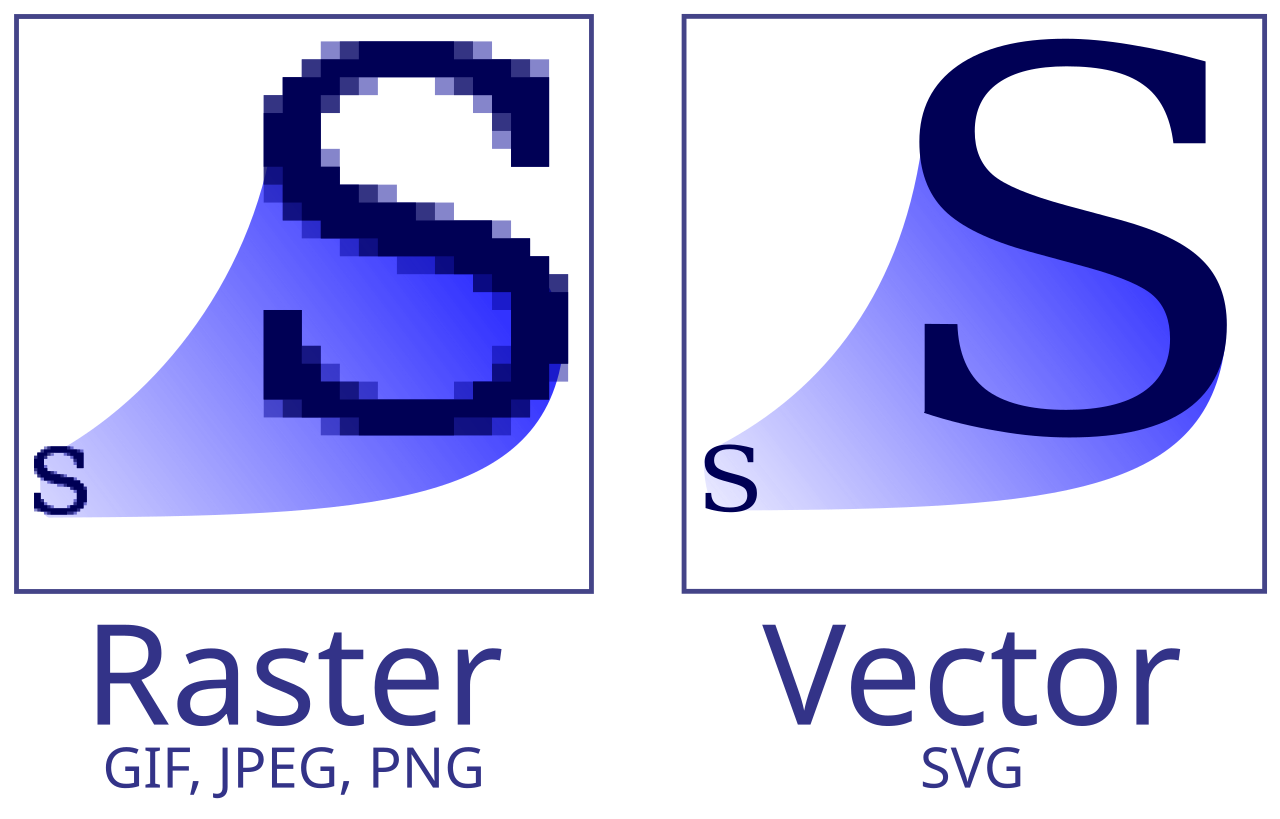
Most digital images are either raster or vector graphics.
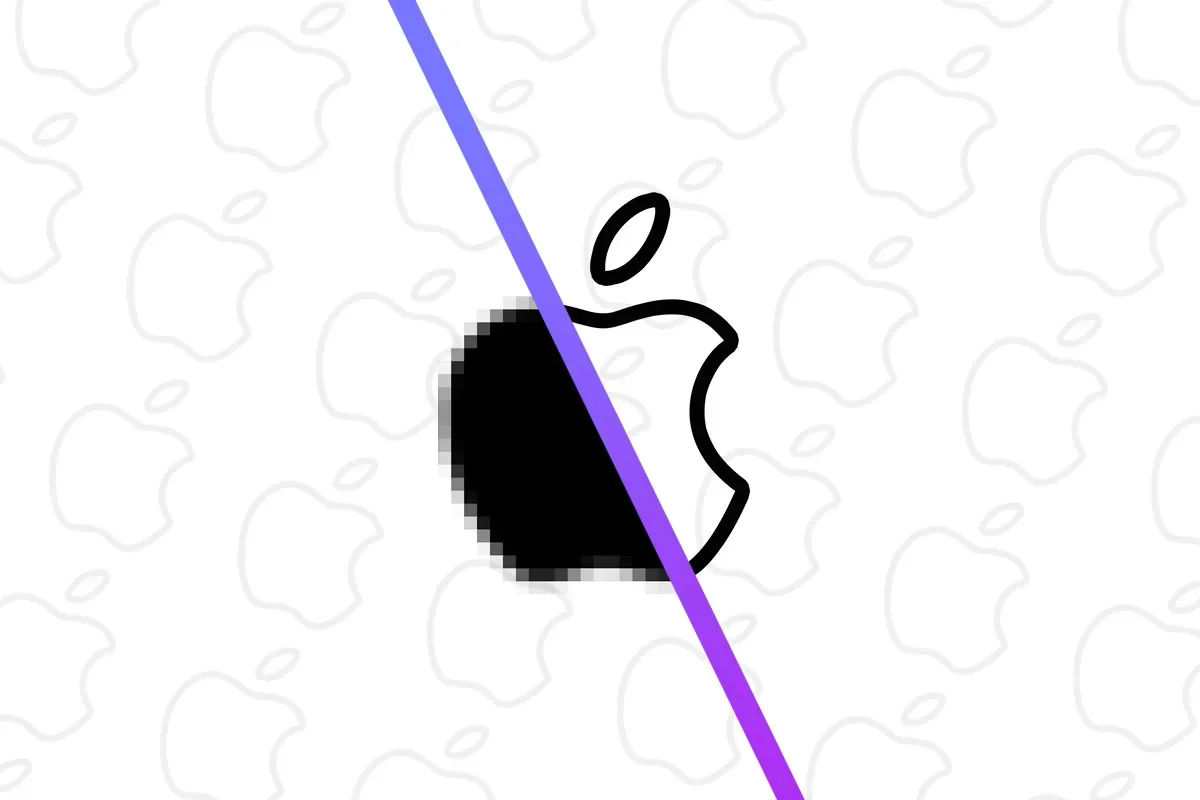
Raster images are made up of pixels. Common formats include JPG, PNG, and GIF. They work well for photographs and many web graphics, but enlarging them too much can make them look blurry or pixelated. Also note that AI generated images are almost always raster images.
Vector graphics use mathematically defined paths, lines, curves, and shapes instead of a fixed grid of pixels. This allows them to scale up or down while maintaining clean edges.
Common vector formats include AI (Adobe Illustrator), EPS, and SVG. PDFs can also contain vector artwork, although not every PDF is a true vector file.
For signage, vector artwork is especially useful when a logo or design needs to be reproduced at different sizes, from a small decal to a large storefront sign.
How to Vectorize an Image: A Step-by-Step Guide
If you have a suitable image file and access to vector design software, you may be able to vectorize it yourself. The exact process depends on the image and the software you use.
Step 1: Find the Best Available Image
Start with the highest-resolution version of your logo or graphic. A large, clean PNG or JPG will generally produce better results than a tiny, blurry image downloaded from a website.
If you already have an AI, EPS, SVG, or vector-based PDF file, you may not need to vectorize it at all. Check the original file before starting.
Step 2: Open the Image in Vector Design Software
Programs such as Adobe Illustrator offer tools for converting raster images into vector artwork.
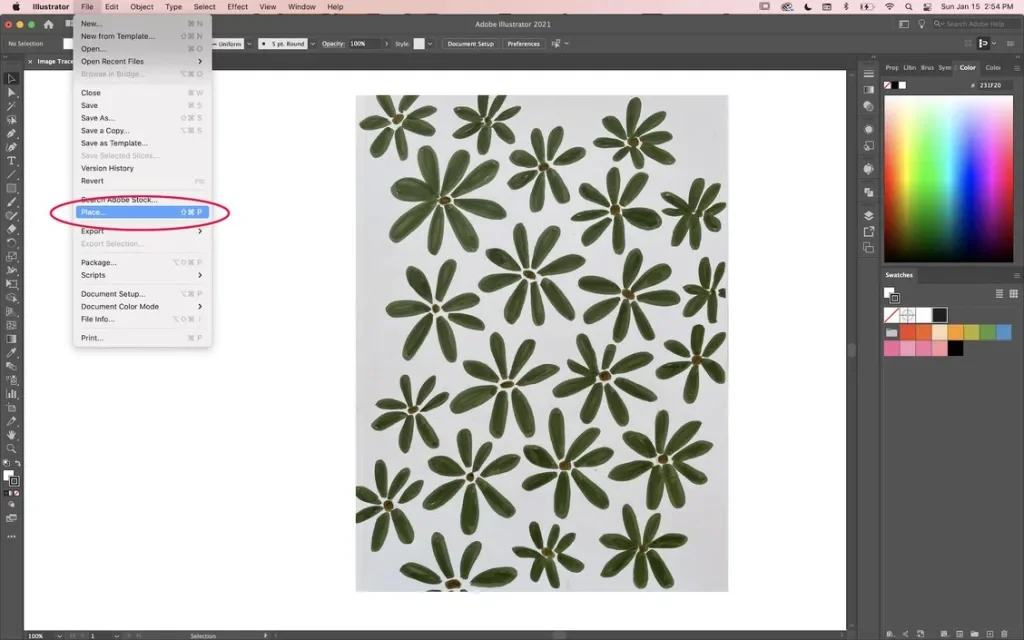
Create a new document, import your image, and position it on the artboard. Keep an untouched copy of the original so you can compare the result with your source artwork.
Step 3: Use Image Tracing or a Similar Tool
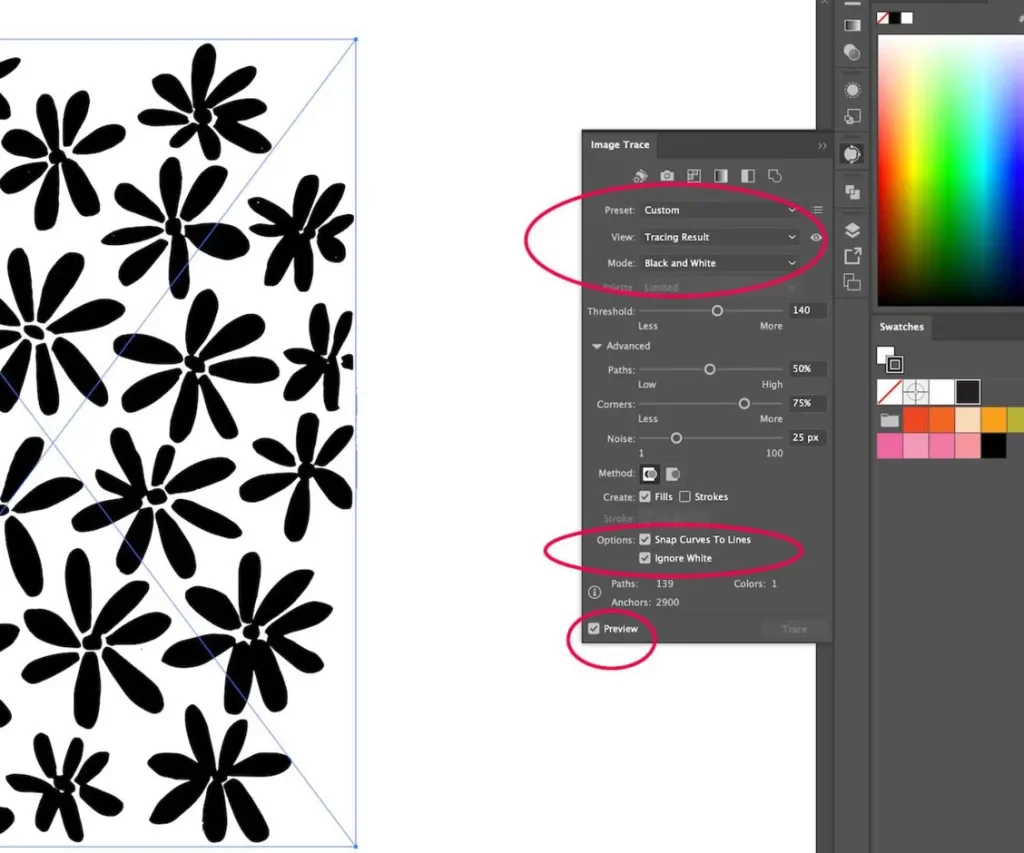
In Adobe Illustrator, select the image and use Image Trace to generate vector paths from the pixels.
Depending on your artwork, you may be able to choose a preset for a black-and-white logo, a limited-color graphic, or a more complex image.
Adjust the tracing settings to control details, paths, corners, and colors. A simple logo with solid colors is usually easier to trace than a photograph with gradients, shadows, and fine details.
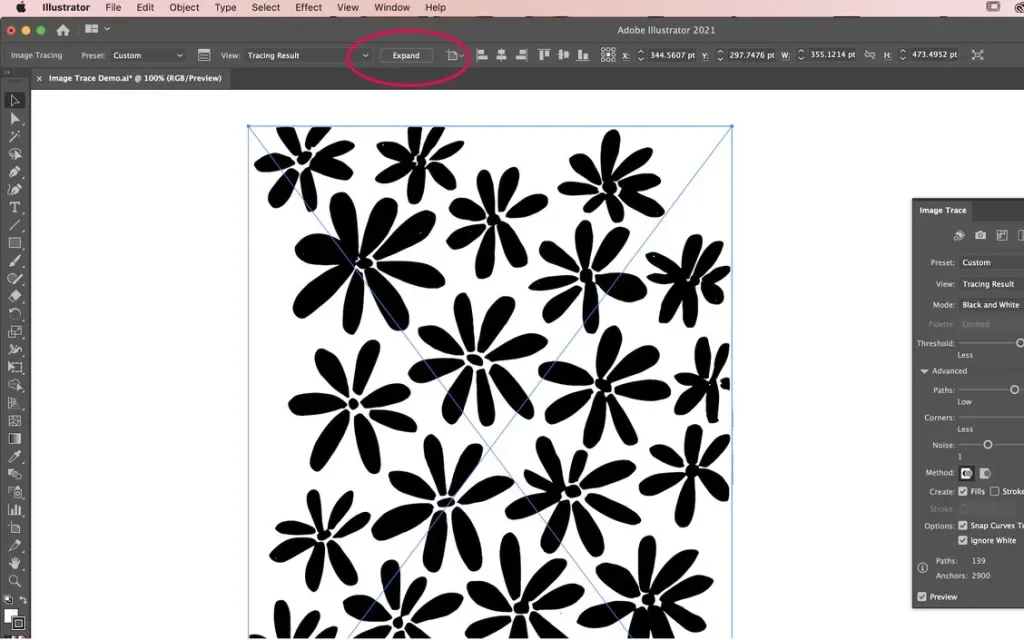
Step 4: Expand and Refine the Artwork
Once the traced result looks right, expand the tracing into editable vector paths.
Inspect the design carefully. Automatic tracing can introduce rough edges, unnecessary points, distorted letters, or small shapes that were not present in the original.
Clean up the paths, correct the shapes, and restore any details that matter to the design. For logos with lettering, check that the characters remain accurate and readable.
Step 5: Check Colors, Lines, and Details
Before using the artwork for signage, review the details that could affect production:
Colors: Confirm that the colors match the intended design.
Fine details: Check that small features will remain visible at the final size.
Line thickness: Make sure thin strokes will reproduce clearly.
Text: Confirm that lettering is accurate and remains editable or is converted to outlines when appropriate for production.
Vectorizing an image does not automatically make it production-ready. The artwork may still need adjustments based on the sign’s size, material, printing method, or fabrication process.
Step 6: Save and Export the File
Save an editable master file, such as an AI file, and export the format required for your project. Depending on the production workflow, this may be an EPS, SVG, or vector-based PDF.
When sending artwork to a sign company, ask which file format is preferred. Also confirm whether fonts should be outlined, whether linked images need to be embedded, and whether specific color settings are required.
Step 7: Review the Artwork at the Intended Size
Finally, inspect the vector file at both a close-up scale and the intended sign size. Look for uneven curves, missing details, incorrect colors, and other imperfections.
The goal is not simply to produce a file that technically qualifies as a vector. It is to create clean, accurate artwork that will reproduce well in the finished sign.
Can You Vectorize Any Image?
Not every image converts cleanly with automatic tracing.
Simple logos, icons, and graphics with clear edges are often good candidates. Photographs, complex illustrations, and low-quality images may require significant manual work to recreate accurately.
Vectorization also cannot restore every detail that has been lost in a low-resolution image. Sometimes, the best solution is to redraw the artwork rather than rely on automatic tracing.

Prefer to Leave Vectorization to a Professional?
If you need a logo or graphic prepared for a sign but don’t want to navigate design software yourself, Davis Sign Co. can help with vectorization.
Our team can review your existing artwork and help prepare it for your signage project. Whether your image needs conversion, cleanup, or additional adjustments, we can help determine the best approach for producing a clear, professional result.
This can be especially useful if you only have a JPG or PNG of your logo, or if your existing artwork looks blurry when enlarged.
You don’t need to become a vector-design expert to get your sign made. Start with the artwork you have, and we can help you understand what is needed to prepare it for production.
Get Your Artwork Ready for Your Next Sign
Planning a new storefront sign, vehicle graphic, wall graphic, or custom decal? Properly prepared artwork helps ensure your design looks sharp and professional at the finished size.
Contact Davis Sign Co. to discuss your artwork and vectorization needs. We’ll help you determine the next steps for getting your design ready for signage.